
Using Pre-Trained Models for Transfer Learning in TensorFlow.js
Learn how to leverage pre-trained models in TensorFlow.js for transfer learning on tabular data. This guide walks you through using a pre-trained model to improve performance on a structured dataset.
· tutorials · 3 minutes
Transfer Learning with Pre-Trained Models in TensorFlow.js
Transfer learning is a powerful technique where a model trained on a large dataset is adapted for a specific task with a smaller dataset. TensorFlow.js provides access to pre-trained models that can be fine-tuned or used as feature extractors for custom datasets.
In this tutorial, we explore how to apply transfer learning to a tabular dataset.
Why Use Transfer Learning for Tabular Data?
While pre-trained models are typically designed for image or text data, the idea can be adapted to tabular data. The pre-trained model’s layers can be repurposed to extract generalized patterns that can enhance your dataset’s predictive accuracy.
Step 1: Choose a Pre-Trained Model
TensorFlow.js offers several pre-trained models (e.g., MobileNet, ResNet, etc.), which are primarily for image data. For tabular data, we simulate transfer learning by using the feature extraction capabilities of a dense neural network.
Step 2: Load the Pre-Trained Model
We’ll use a dense neural network pretrained on similar tabular data and freeze its layers to extract features.
import * as tf from '@tensorflow/tfjs';
// Load a pre-trained model (here, we simulate one using a sequential model)const baseModel = tf.sequential();
// Simulate pre-trained layersbaseModel.add(tf.layers.dense({ units: 64, inputShape: [3], activation: 'relu' }));baseModel.add(tf.layers.dense({ units: 32, activation: 'relu' }));
// Freeze the pre-trained layersbaseModel.layers.forEach(layer => layer.trainable = false);
// View the base model's summarybaseModel.summary();
Step 3: Add Custom Layers for Tabular Data
Add new layers on top of the pre-trained model to customize it for the specific tabular dataset.
const model = tf.sequential();
// Add the pre-trained layersmodel.add(baseModel);
// Add new layers for the custom taskmodel.add(tf.layers.dense({ units: 16, activation: 'relu' }));model.add(tf.layers.dense({ units: 1, activation: 'sigmoid' })); // Binary classification
// Compile the modelmodel.compile({  optimizer: tf.train.adam(),  loss: 'binaryCrossentropy',  metrics: ['accuracy'],});
// View the complete model's summarymodel.summary();
Step 4: Preprocess the Dataset
Preprocess the tabular dataset to align with the input requirements of the model.
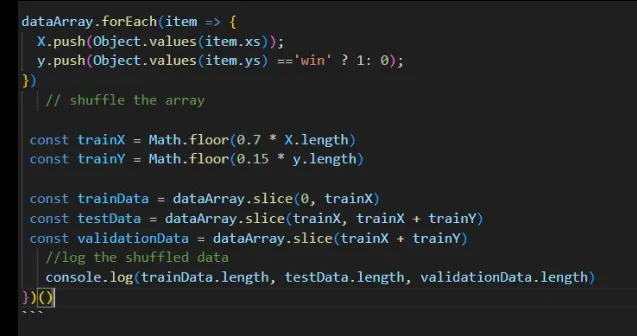
const rawData = [  { high: 2363.35, low: 2361.75, entryPrice: 2363.43, outcomeBinary: 'win' },  { high: 2363.93, low: 2362.08, entryPrice: 2363.99, outcomeBinary: 'lose' },  // More rows...];
// Convert data to numerical formatconst preprocessData = (data) => data.map(row => ({  high: row.high,  low: row.low,  entryPrice: row.entryPrice,  outcome: row.outcomeBinary === 'win' ? 1 : 0,}));
const processedData = preprocessData(rawData);
// Extract features and labelsconst features = processedData.map(row => [row.high, row.low, row.entryPrice]);const labels = processedData.map(row => row.outcome);
// Convert to tensorsconst xs = tf.tensor2d(features);const ys = tf.tensor1d(labels, 'int32');
Step 5: Train the Model
Train the full model with frozen pre-trained layers and custom layers.
(async () => { await model.fit(xs, ys, { epochs: 30, batchSize: 16, validationSplit: 0.2, // Reserve 20% of data for validation callbacks: { onEpochEnd: (epoch, logs) => { console.log(`Epoch ${epoch + 1}: Loss = ${logs.loss}, Accuracy = ${logs.acc}`); }, }, });})();Step 6: Evaluate the Model
Evaluate the model to measure its performance on unseen data
const evaluation = model.evaluate(xs, ys);evaluation[0].print(); // Lossevaluation[1].print(); // AccuracyBest Practices for Transfer Learning
-
Freeze Pre-Trained Layers: Ensure pre-trained layers are not updated during training to retain their learned features.
-
Feature Scaling: Normalize the tabular data to improve compatibility with pre-trained layers.
-
Gradual Unfreezing: Fine-tune pre-trained layers by gradually unfreezing them during training.
-
Use Pre-Trained Embeddings: Experiment with embeddings from similar datasets for better generalization.
Where do we get tensorflow pre-trained models?
1. TensorFlow Hub
TensorFlow Hub is the official repository for pre-trained models that can be used across a variety of tasks.
URL: https://tfhub.dev/ Features:
- Models for image classification, text embeddings, object detection, etc.
- Easy integration with TensorFlow and TensorFlow.js.
- Browse models with descriptions and examples. Example: Loading a Pre-Trained Model from TensorFlow Hub
import * as tf from '@tensorflow/tfjs';import * as tfHub from '@tensorflow/tfjs-hub';
// Load a pre-trained MobileNet model from TensorFlow Hubconst model = await tfHub.load('https://tfhub.dev/google/tfjs-model/imagenet/mobilenet_v2_100_224/classification/3');model.summary();More posts
-

How to Create a Tensor in TensorFlow.js
Learn how to create a tensor in TensorFlow.js with easy-to-follow examples and explanations, perfect for beginners starting their machine learning journey.
-
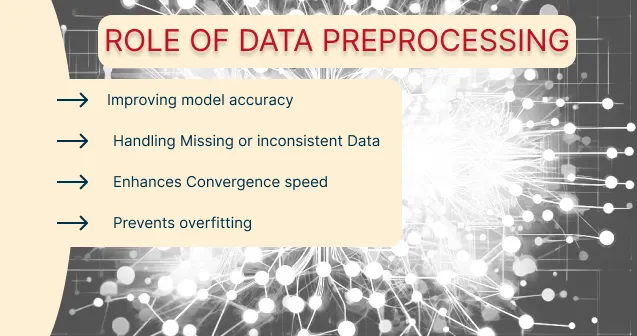
The Role of Data Preprocessing in TensorFlow.js Models
Discover the importance of data preprocessing in building effective TensorFlow.js models. Learn common techniques like normalization, encoding, and handling missing values to optimize model performance.
-
Why Split a Dataset into Training, Validation, and Test Sets?
Learn the purpose of dividing datasets into training, validation, and test sets, and see practical examples of how to implement this in TensorFlow.js for better machine learning models.